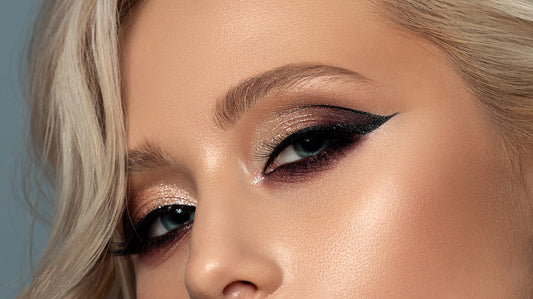
If you've been trying to achieve the perfect winged eyeliner, you're not alone. So many of us want it and so few of us can do it. But with the right tools and techniques, there's no reason why you shouldn't be able to master this look in a jiffy!

Follow A Liquid Liner Or Gel Eyeliner Application
The key to achieving the perfect winged eyeliner is following a liquid or gel liner application. You can use either one for this tutorial, but we'll be using liquid liner because it tends to be easier for beginners. The steps are basically the same regardless of which product you use:
Draw a line from your inner corner of your eye to outer corner. Make sure it's straight and even! If needed, use a Q-tip dipped in makeup remover to clean up any mistakes made along the way; this will help ensure that both sides of your eyes match up perfectly when you're done with step 2 below.
Get A Good Brush
The first step to achieving the perfect winged eyeliner is getting a good brush. A good brush will be soft and have a fine tip, which makes it easier for you to create the perfect line. You can find these at any drugstore or department store for anywhere between $5-$20 USD;
Choose The Right Pencil
For the best results, choose a pencil that's easy to apply, sharpen, blend and remove. For example:
- A pencil with a creamy texture is easier to apply than one with a hard texture. It will glide on your eyelid without tugging or pulling at your skin - which can lead to uneven lines or smudging in the wrong places. Also consider how soft or firm it feels in your hand; if it feels too rigid or flimsy when you're holding it up against your face (or if there's no weight at all), then this isn't going to work well for you either!
- Try using two different types of pencils: one for outlining and filling in and another one specifically designed for blending out harsh edges between colors so they look natural instead of harsh-looking like they've been drawn on by hand, which some people may find easier than trying their luck at getting everything precise enough before applying any kind of mascara!
Try Now: All Natural Eyeliner Pencil - Black
Master The Angle Of Your Winged Liner
One of the most important things to keep in mind when creating a winged eyeliner look is the angle at which you apply it. You want to be sure that your line is perfectly straight and even on both sides, starting at the inner corner of your eye and ending at its outer edge.
If you're not sure what this looks like, practice on your hand first, but don't forget to clean up any mistakes with makeup remover before they set! Once you've mastered this technique, transfer it onto your face using a brush or pen liner (pencil liners tend not to work as well).
Make Sure You Have A Steady Hand
First, you'll need a mirror and a steady hand. The whole point of this exercise is to get your winged eyeliner as perfect as possible, so you want to make sure your hand isn't shaking or moving at all when applying the product. Before you start drawing on your eye with eyeliner pencils, practice drawing thin lines on random objects like paper towels or napkins until it feels natural and easy for you.
Once that's done, take a deep breath (and maybe sip some water) before beginning the actual process of putting liner onto your eyes - it'll help keep things under control! Once again: take it slow; don't rush through any part of this process because rushing only leads to mistakes. Try doing everything in one fluid motion instead of stopping halfway through each step - that way there won't be any pauses between steps where accidental smudges could happen!
Conclusion
We hope you've enjoyed learning how to apply the perfect winged eyeliner. This is a great technique to have in your arsenal, and we think it will make your eyes stand out no matter what look you're going for.


